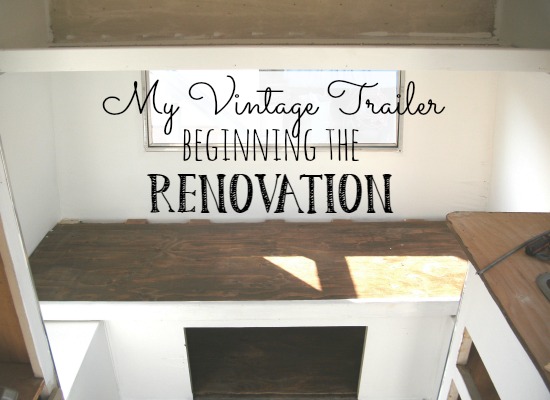
My Vintage Trailer - Beginning the Renovation
09 November
A couple of days ago I shared all the before photos of my little vintage trailer. You can check it out here if you missed it: My Vintage Trailer - A Tour Before the Renovation.
The renovation took place about 4 years ago (my how time flies!) but at some point between then and now I lost a bunch of my blog posts and most of those trailer posts are now gone :o(
Never fear though, I'm recreating those posts and re-sharing the renovation process!
Today I'm sharing the beginnings of the renovation.
You may remember from these before pictures that there had been some issues at some point with leaking, the arrows show where there were past leaks.
PS. I have included links to the products (or some like them) that I've used for your convenience. If you make a purchase from one of the links in this post I will earn a small commission but it will not cost you a penny more! Click here to see my full Disclosure Policy.
Everything seemed dry and we think that the leaks had been fixed prior to when I purchased the trailer but just to be sure my dad did some work on the roof and underneath to coat the seams with something to help seal it up. He used Snow Roof Mobile Coat on the roof.
This stuff is made to waterproof and maintain mobile home and RV roofs and once applied it cures to form a tough, seamless membrane that helps to seal and protect the roof.
So, whether or not you choose to use the Snow Roof sealer will depend on what kind of trailer you have and what your intentions are for it :o)
Underneath, my dad used a rubberized undercoating, 3M 03584 Professional Grade Rubberized Undercoating - 16 oz., to help protect the wood underneath from wet roadways.
He chose to use a spray on application but it does also come in brush on.
While he was working on the outside...
I got busy cleaning the inside. This poor trailer was F.I.L.T.H.Y.!!
I actually didn't mind all the scrubbing much, it was kind of satisfying to see the layers of dirt disappear!
But then I started sanding... I H.A.T.E. sanding!! I had to wear one of these 3M Home Dust Masks
 so I wouldn't inhale the large cloud of dust I was creating in the trailer and I am a tiny bit claustrophobic so this really drove me crazy!
Sanding, sanding, and more sanding... you can see the old black mold sanded right off in the corners!
The awkward spaces that required me to contort my body into all kinds of weird positions and the ceiling were the worst spots to sand! Did I mention how much I hate sanding?

So, once she was all cleaned and sanded, there were some nasty old pieces of wood that needed to be replaced on the seating areas. Notice the front window is missing too, more on that in a moment.
We used the old pieces of wood as patterns to be sure to get the new pieces the correct size. All of the seats have storage underneath so we added finger holes in the plywood to make them easy to lift up for access to the storage areas.
Once we got all the new wood cut and fitted we stained it.
So, about that missing window... It was broken along one corner when I bought the trailer so I had a new window made by a local glass company.
It wasn't expensive at all, under $75. We were scraping off the old caulking in this pic :o)
And here is the sparkling new window!!
Now it was time for paint! I gave the entire inside of the trailer (except the ceiling, that's a surprise for later!) a coat of KILZ MAX Maximum Stain and Odor Blocking Interior Latex Primer/Sealer and then paint.
We also made some adjustments to the top bunk.
Since this trailer will sleep 3 comfortably without that top bunk and I don't know of any adult sized people that would feel comfortable crammed up there anyway and not planning on having anymore child-sized people I decided I wanted to shorten the bunk so it was more of a shelf instead.
We just cut the wood down so it isn't as deep and then reused the long hinge. Here is a picture of what it looked like before.
I'm planning to use the shelf for a couple of vintage suitcases to store blankets and traveling games in.
Here are some more fun trailer related books I picked for you. If you are a woman planning to pull your own trailer and you don't have a lot of experience (like me!) then you will definitely want the Glamping with MaryJane: Glamour + Camping book!! It teaches you everything from how to hook up and back up a trailer to recipes!
Check out the vintage trailer restoration resource page!
The renovation took place about 4 years ago (my how time flies!) but at some point between then and now I lost a bunch of my blog posts and most of those trailer posts are now gone :o(
Never fear though, I'm recreating those posts and re-sharing the renovation process!
Today I'm sharing the beginnings of the renovation.
You may remember from these before pictures that there had been some issues at some point with leaking, the arrows show where there were past leaks.
PS. I have included links to the products (or some like them) that I've used for your convenience. If you make a purchase from one of the links in this post I will earn a small commission but it will not cost you a penny more! Click here to see my full Disclosure Policy.
Everything seemed dry and we think that the leaks had been fixed prior to when I purchased the trailer but just to be sure my dad did some work on the roof and underneath to coat the seams with something to help seal it up. He used Snow Roof Mobile Coat
This stuff is made to waterproof and maintain mobile home and RV roofs and once applied it cures to form a tough, seamless membrane that helps to seal and protect the roof.
I did read on several vintage trailer boards online that some people frown on using this but I think that those people are more into actually restoring a trailer to it's original condition. My trailer is a Scotsman and truth be told, they seem to be one of the cheaper trailers made, they're not quite as nice as some and I wasn't trying to restore mine to original anyway. I just wanted to fix any issues, give it a sweet makeover, and then actually use it!
So, whether or not you choose to use the Snow Roof sealer will depend on what kind of trailer you have and what your intentions are for it :o)
Underneath, my dad used a rubberized undercoating, 3M 03584 Professional Grade Rubberized Undercoating - 16 oz.,
He chose to use a spray on application but it does also come in brush on.
While he was working on the outside...
I got busy cleaning the inside. This poor trailer was F.I.L.T.H.Y.!!
I actually didn't mind all the scrubbing much, it was kind of satisfying to see the layers of dirt disappear!
But then I started sanding... I H.A.T.E. sanding!! I had to wear one of these 3M Home Dust Masks
Sanding, sanding, and more sanding... you can see the old black mold sanded right off in the corners!

So, once she was all cleaned and sanded, there were some nasty old pieces of wood that needed to be replaced on the seating areas. Notice the front window is missing too, more on that in a moment.
We used the old pieces of wood as patterns to be sure to get the new pieces the correct size. All of the seats have storage underneath so we added finger holes in the plywood to make them easy to lift up for access to the storage areas.
Once we got all the new wood cut and fitted we stained it.
So, about that missing window... It was broken along one corner when I bought the trailer so I had a new window made by a local glass company.
It wasn't expensive at all, under $75. We were scraping off the old caulking in this pic :o)
And here is the sparkling new window!!
What a difference! You can see how different the color of the unpainted ceiling looks against the freshly painted walls.
Since this trailer will sleep 3 comfortably without that top bunk and I don't know of any adult sized people that would feel comfortable crammed up there anyway and not planning on having anymore child-sized people I decided I wanted to shorten the bunk so it was more of a shelf instead.
We just cut the wood down so it isn't as deep and then reused the long hinge. Here is a picture of what it looked like before.
I'm planning to use the shelf for a couple of vintage suitcases to store blankets and traveling games in.
Here are some more fun trailer related books I picked for you. If you are a woman planning to pull your own trailer and you don't have a lot of experience (like me!) then you will definitely want the Glamping with MaryJane: Glamour + Camping
Check out the vintage trailer restoration resource page!
Posted by: Tania | Little Vintage Cottage
at 09 November
Tag:
home decor


