Canning Jar Ring Pumpkin
24 September
I've got another inexpensive and easy fall DIY to share with you today.
You may have seen something similar before.
It uses canning jar rings which is an inexpensive thing to buy or maybe you already have some.
Canning Jar Ring Pumpkin

This post contains some affiliate links for your convenience (which means if you make a purchase after clicking a link I will earn a small commission which helps keep my blog up and running but it won't cost you a penny more)! Click here to read my full disclosure policy.
I found my box of canning jar lids and rings at the thrift store but you may have some lying around if you are a canner or your mother or grandmother perhaps!

If you buy a box of them like this you will have both the lids and the rings, you'll only use the rings for this project.
Lay the rings out and give them a couple of coats of orange spray paint.

Once the paint has dried gather up the rings so that they are all going in the same direction, they will kind of nest inside one another and you'll be able to shape them into a pumpkin.
Use a chenille stem or pipe cleaner to gather them all up. At first, just loosely twist it around them like so. You'll need it looser while you arrange the rings.

Now, I'll be honest, this will take a little bit of finagling to get them to finally form a pumpkin shape. Don't give up, it'll happen!!
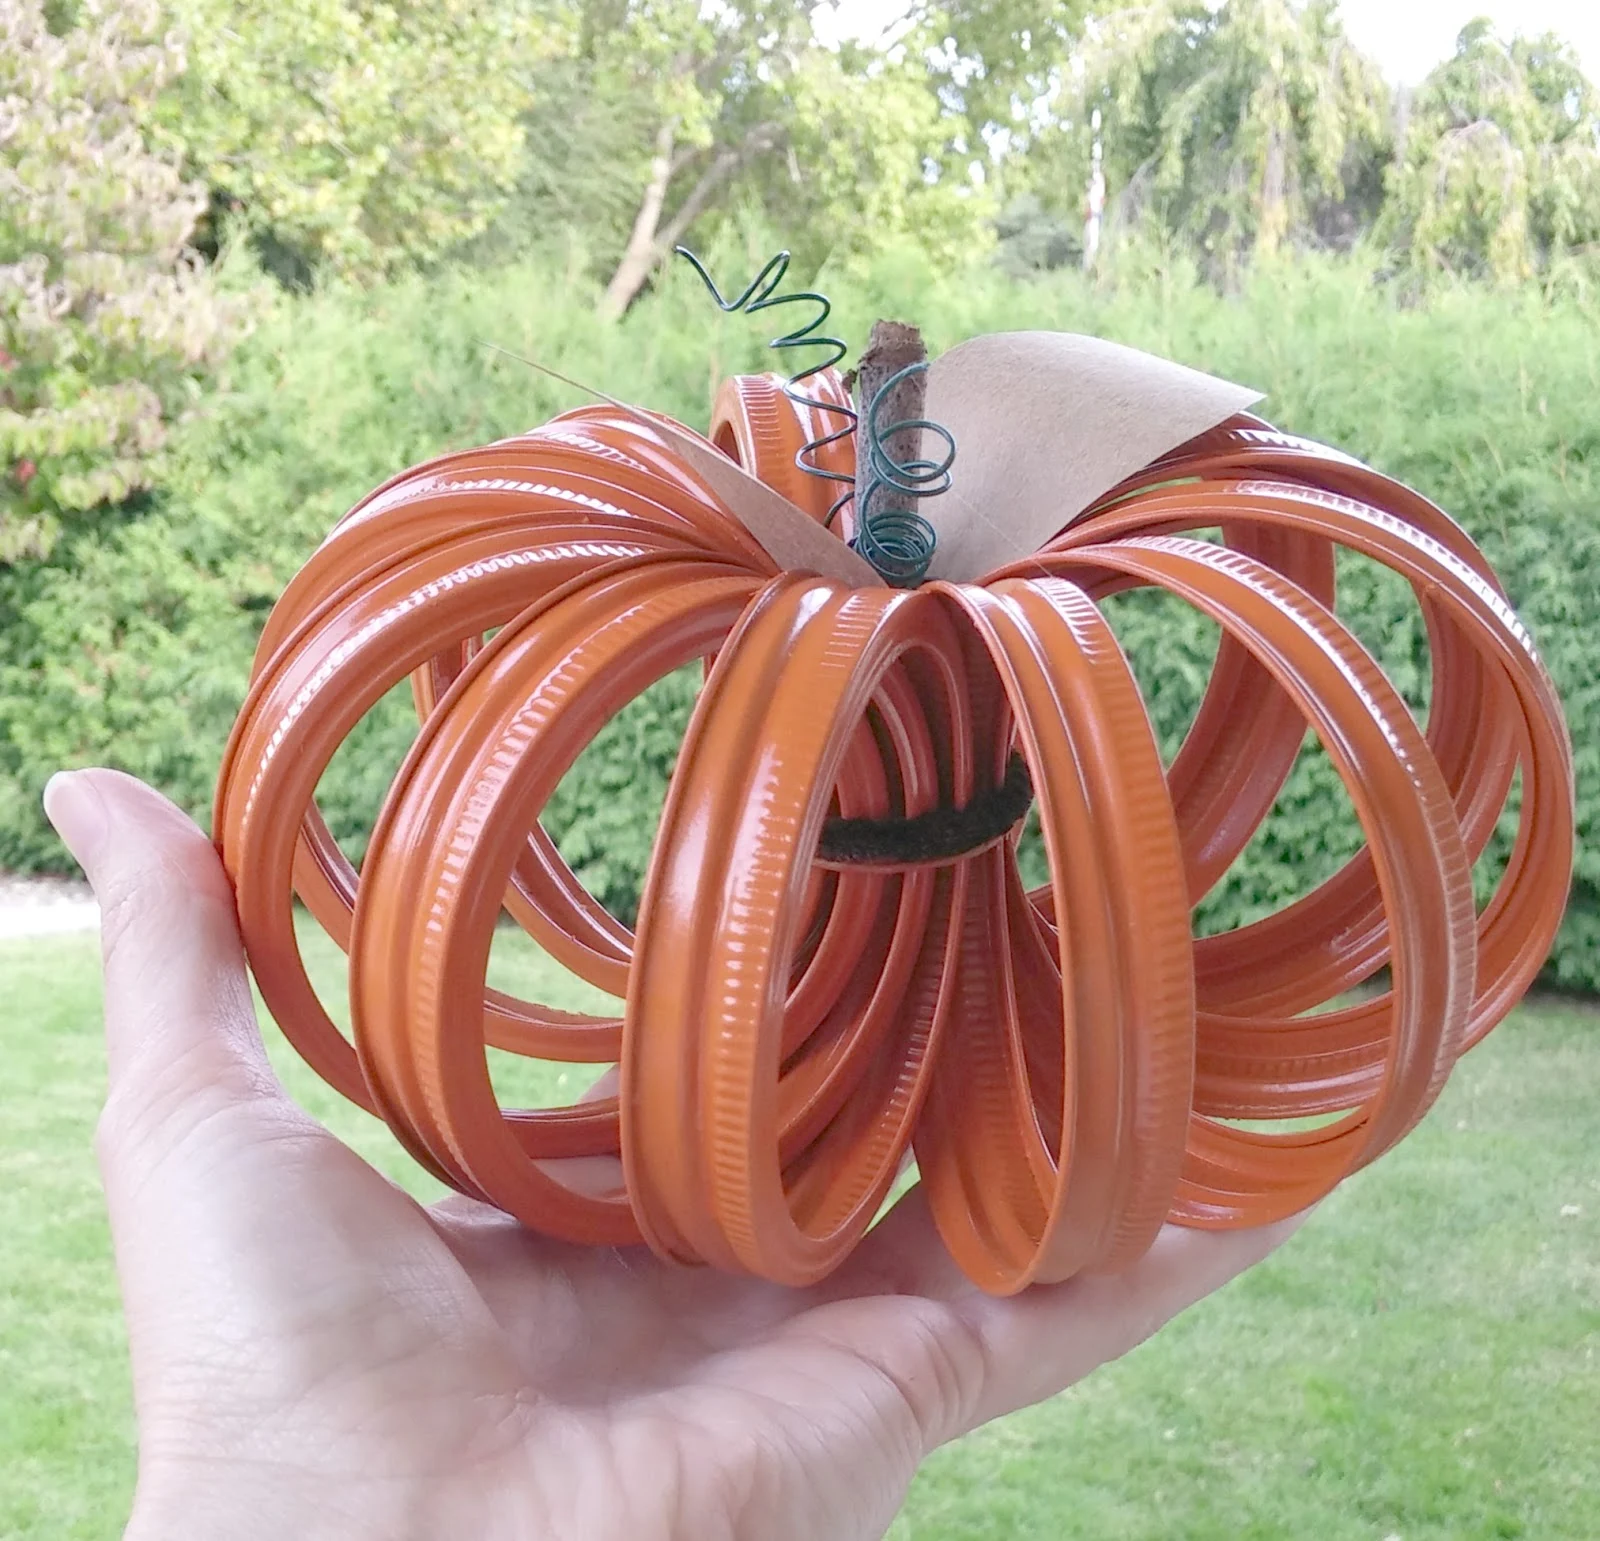
Most people make them with 22 to 24 rings, I only had 12. I think it would probably be a little easier with more.
Once you get the shape to start looking like a pumpkin, start twisting the chenille stem tighter.

The paint will get a little dinged up during the arranging process but don't worry, you can just respray in those areas!
Once you have it as tight as you can and it looks how you want it to, trim the stem ends (I also tied mine with a length of jute twine... I had twisted the chenille stem so much that I thought it might break!)

Then you'll need a stem. You can use a twig like I did, another chenille stem, a cinnamon stick, or just a dowel... use what you have, it'll be cute no matter what!! 😄
Make some leaves. Again, use what you have... I used brown Kraft paper but you can use scrapbook paper, silk leaves, real leaves, or even newspaper!
My tendrils are made from a piece of florist's wire that I wrapped around a pencil to get the coils.

Now, hold up your super cute pumpkin and admire your handy work!


There are so many fun variations from other talented makers on Etsy if you don't want to make your own!
If you enjoyed this project, please consider sharing!
PIN ME!!!


Posted by: Tania | Little Vintage Cottage
at 24 September
Tag:
fall


Love it! There are so many variations but basically the same!
ReplyDeleteThanks!
ReplyDeleteWhat a cute idea - love it!
ReplyDeleteThanks!
ReplyDeleteI love these pumpkins. It is such a cute idea.
ReplyDeleteThanks Debra!
ReplyDeleteTania
Your pumpkin is adorable Tania. Love it!
ReplyDeleteThank you so much Tuula!
ReplyDeleteTania
This is such a cute project Tania. Thank you for linking it up at Create, Bake, Grow & Gather this week. I'm delighted to be featuring it at tonight's party and pinning too!
ReplyDeleteYay, thank you so much Kerryanne!
ReplyDeleteTania
Hi Tania,
ReplyDeleteJust wanted to stop by and let you know that this post was featured in the Create, Bake, Grow & Gather link party Fall Feature magazine at https://issuu.com/shabbyartboutique/docs/create__bake__grow___gather_party_f
I thank you for your contributions to the party.
Hugs, Kerryanne
Oh! Thank you so much Kerryanne! What a beautiful magazine! I'm honored to be included!
ReplyDeleteTania
Your canning jar ring pumpkin is so cute, Tania. I love how easy they are to make too!
ReplyDeleteThanks! They are very easy to make!
Delete