DIY Brass Animals
23 May
I have a small, but growing, collection of little brass animals and I'm always looking for more to fill in my collection.
The problem is sometimes they are kinda spendy, even at the thrift stores! I guess they have caught on to the surge in popularity of brass lately!
I was out thrifting one day... looking for little brass animals... they are getting harder and harder to come by... when I came across a ceramic swan and I wondered if I could DIY my own brass animals.
I decided to give it a shot!
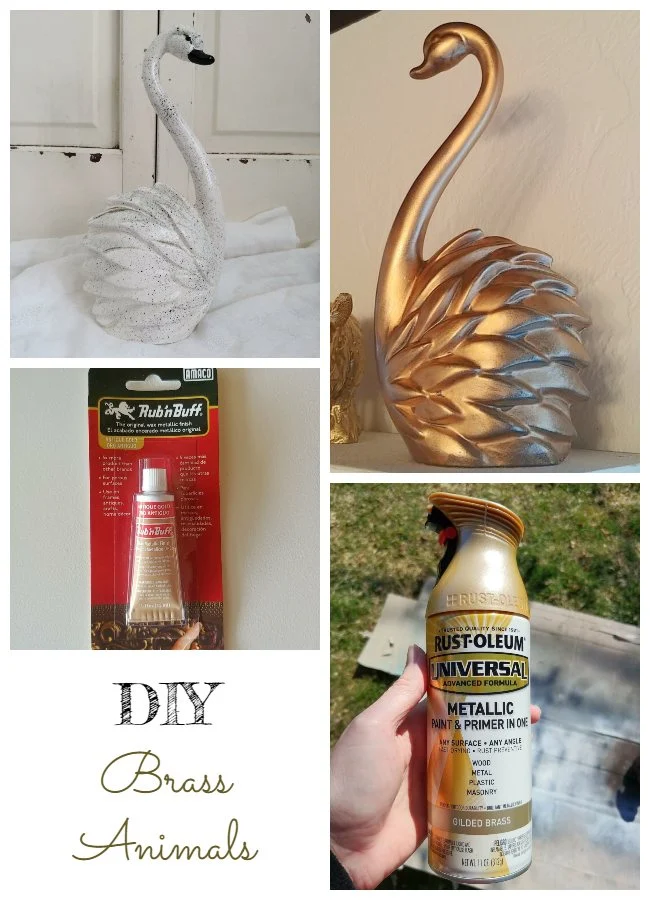
Here is my swan. I shared it at Treasure Trove Tuesday, it was .99 cents so a great candidate for an experiment!
I started with this Gilded Brass spray paint but it turned out a little too gold so I then went over it with Hammered Metal spray paint in Dark Bronze.
Here is what it looked like at this point:
It was still not quite right so I used some Rub 'n Buff over the top.
You just knead the tube a little bit to make sure it's all mixed up (otherwise it will be really runny) and put a little bit on your finger and then smear it on your animal. It's a little bit like finger painting!
You can see how I didn't get it into all the crevices. That's exactly what I wanted because if you look at real brass it's darker in the crevices.
It dries very, very fast. Once it's dry buff it with a rag or paper towel.
Didn't she turn out pretty?
Here she is with all her new brassy friends!
I was excited that my idea actually worked!
PIN ME!
The problem is sometimes they are kinda spendy, even at the thrift stores! I guess they have caught on to the surge in popularity of brass lately!
I was out thrifting one day... looking for little brass animals... they are getting harder and harder to come by... when I came across a ceramic swan and I wondered if I could DIY my own brass animals.
I decided to give it a shot!
DIY Brass Animals
If I hadn't just told you that I tried this technique on a swan do you think you'd be able to tell which one is NOT real brass?
Maybe... but it's pretty close if you ask me! 😏
This post contains some affiliate links for your convenience (which means if you make a purchase after clicking a link I will earn a small commission which helps keep my blog up and running but it won't cost you a penny more)! Click here to read my full disclosure policy.
This post contains some affiliate links for your convenience (which means if you make a purchase after clicking a link I will earn a small commission which helps keep my blog up and running but it won't cost you a penny more)! Click here to read my full disclosure policy.
Supplies Needed to Try This Yourself!
- Inexpensive ceramic animals (I found mine a Goodwill but the Dollar Store might have some too)
- Brass Spray Paint (I used two different colors in my experiment but I think this one would work better)
- Rub 'n Buff in Antique Gold
- Rag or Paper Towel
Here is my swan. I shared it at Treasure Trove Tuesday, it was .99 cents so a great candidate for an experiment!
I started with this Gilded Brass spray paint but it turned out a little too gold so I then went over it with Hammered Metal spray paint in Dark Bronze.
Here is what it looked like at this point:
It was still not quite right so I used some Rub 'n Buff over the top.
You just knead the tube a little bit to make sure it's all mixed up (otherwise it will be really runny) and put a little bit on your finger and then smear it on your animal. It's a little bit like finger painting!
You can see how I didn't get it into all the crevices. That's exactly what I wanted because if you look at real brass it's darker in the crevices.
It dries very, very fast. Once it's dry buff it with a rag or paper towel.
Didn't she turn out pretty?
Here she is with all her new brassy friends!
I was excited that my idea actually worked!
PIN ME!
Posted by: Tania | Little Vintage Cottage
at 23 May
Tag:
DIY & Crafts


