Christmas in August - DIY Putz Houses
Welcome back to 12 Months of Christmas Ornaments. It's time for Christmas in August!
This month I'm going to show you how to make your own sweet Putz houses.
Christmas in August - DIY Putz Houses
This post contains some affiliate links for your convenience (which means if you make a purchase after clicking a link I will earn a small commission which helps keep my blog up and running but it won't cost you a penny more)! As an Amazon Associate, I earn from qualifying purchases. Click here to read my full disclosure policy.
As always, there will be a YouTube tutorial below, and the written instructions right below that.
- DIY Putz house pattern (download the pattern here)
- Recycled cereal box
- Craft paint - white, yellow, pink (or the color of your choice)
- A paint brush
- White craft glue
- Mod Podge
- Small clamps (or clothespins)
- Chunky white glitter
- Black Sharpie marker
- Ruler, pencil, scissors
- Bone folder (or butter knife)
- Miniature items (bottle brush trees, deer, snowman, etc.)
- Christmas-themed scrapbook paper (jut a small scrap)
- Miter shears (optional)
If you don't know what a Putz house is, here's a quick definition:
Putz houses were popular from about 1928 through the 1950s. The story goes that they are named after Putz, a Pennsylvania German term meaning "ornament, decoration, or finery," and putzen "to clean, decorate." They were invented by the Japanese for the American market. Source: Retro Renovation.
Here's the video tutorial.
For the written tutorial, I am sharing how to make this one.
Step 1 - Trace the pattern pieces onto the recycled cereal (or other) box and cut them out.
You can get a bunch of houses out of a large cereal box. I've made four houses so far and have enough of the box left to make about four more!
Step 4 - Create the base and assemble it.
Step 5 - Paint the house.
Paint the roof and base of your house white.
Step 6 - Add the details.
Draw the door and window onto the house with a pencil.
Step 8 - Add details.
Add the miniatures of your choice.
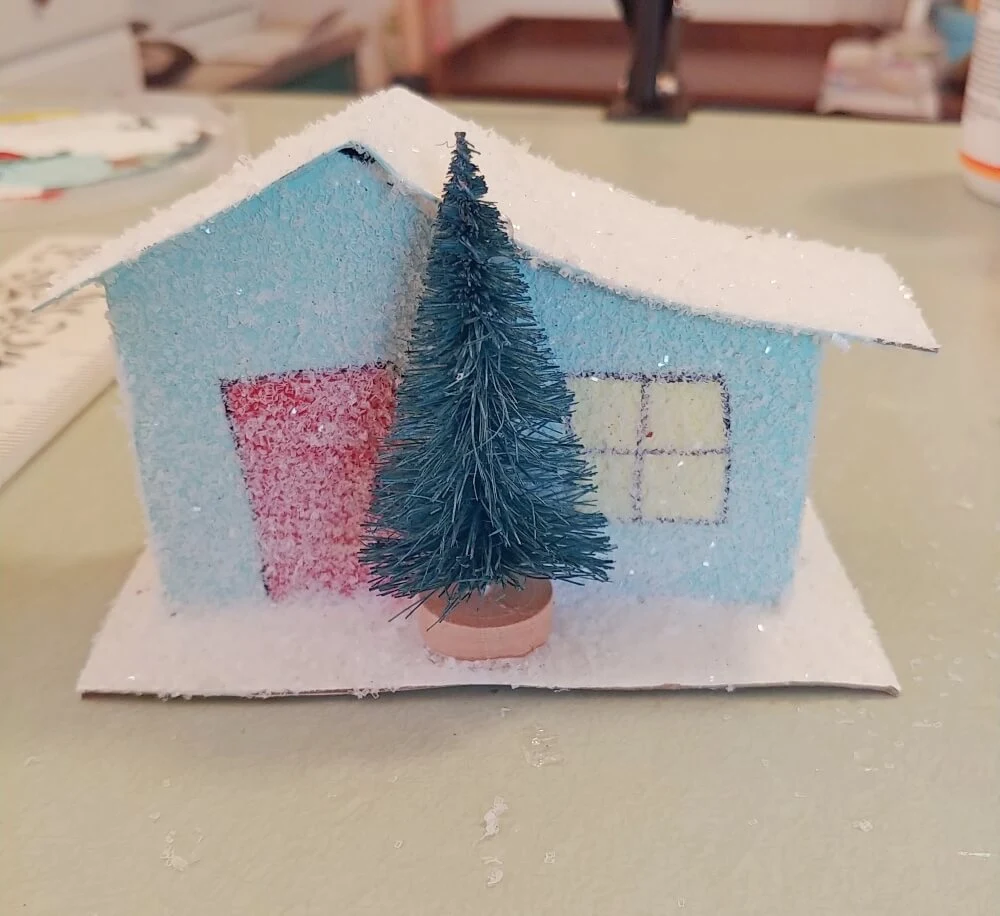
Every vintage Putz house that I've ever seen has a tree next to it so I chose to do that.
Step 9 - Sign and share your houses!
Be sure to sign the bottom of your house so future loved ones will know who made it!
And share your finished houses on the Facebook share thread.
Here is the house I made in the video.
Retro Christmas Ornaments DIY - Christmas in January
Spun Cotton Ornaments DIY - Christmas in February
Old-Fashioned Felt and Sequin Ornaments - Christmas in March
Clothespin Dolls - Christmas in April
Retro Drum Ornaments - Christmas in May
Macrame Santa Ornaments - Christmas in June
Salt Dough Mushroom Ornaments - Christmas in July
I hope that you enjoyed this month's tutorial! If you did, I'd love it if you would share it 😊
PIN ME!


.jpg)
.jpg)

.jpg)
.jpg)
.jpg)
.jpg)
.jpg)
.jpg)
.jpg)
.jpg)
.jpg)
.jpg)
.jpg)
.jpg)
.jpg)
.jpg)
.jpg)

.jpg)
.jpg)
.jpg)
.jpg)

.jpg)
.jpg)
.jpg)
.jpg)
.jpg)


Both houses are so cute Tania! You'd never know they're made from a cereal box.
ReplyDeleteThank you Tuula :)
DeleteSo cute Tania! This would be a fun craft for me to do with my grandkids.
ReplyDeleteThank you Marie! Yes, they would be fun to do with your grandkids. You're going to have so much fun this Christmas since you have more time. I hope you are enjoying your retirement from blogging :)
DeleteI don't think I've ever heard of a Putz house, but they're adorable. I can see so many fairy-like possibilities. Thanks for sharing the how-to, Tania
ReplyDeleteThank you so much Michelle! I'm glad you like them.
DeleteWho knew a cereal box could become so cute! These are adorable Tania! And how wise of you to get going on Christmas early!
ReplyDeleteThank you so much Donna! I've been making a new ornament each month so by the time Christmas hits us I'll have like a whole tree's worth of new ornaments!
DeleteYou know i love putz houses and these are no exception!! Your little village is adorable!
ReplyDeleteThank you!
Delete